[강의요약] 스프링부트 개념과 활용 - 스프링 시큐리티
개인적인 학습을 위한 Inflearn - 스프링부트 개념과 활용(백기선) 강의 요약입니다.
개념과 원리 위주로 요약합니다.
이전 글 에서 이어집니다.
4부. 스프링 부트 활용 - 스프링 시큐리티
1. Starter-Security
신규 프로젝트 생성 : springbootsecurity(의존성 - starter-web 하나만)
1-1. view 하나 만들기
1-1-1. thymeleaf 의존성 추가
        <dependency>
            <groupId>org.springframework.boot</groupId>
            <artifactId>spring-boot-starter-thymeleaf</artifactId>
        </dependency>
1-1-2. 컨트롤러 만들기
- Controller에 로직 없이 view만 뱉어주면 되는 경우 WebMvcConfigurer.addViewController로 사용이 가능
@Controller
public class HomeController {
    @GetMapping("/hello")
    public String hello() {
        return "hello";
    }

    @GetMapping("my")
    public String my() {
        return "my";
    }
}
1-1-3. 뷰 만들기
index.html, hello.html, my.html
각각 <h1>파일명 텍스트</h1>을 갖는다.
1-1-4. api 슬라이스 테스트 만들기
@RunWith(SpringRunner.class)
@WebMvcTest(HomeController.class)
public class HomeControllerTests {
    @Autowired
    MockMvc mockMvc;

    @Test
    public void hello() throws Exception {
        mockMvc.perform(get("/hello"))
                .andDo(print())
                .andExpect(status().isOk())
                .andExpect(view().name("hello"));
    }
}
1-2. 스프링 시큐리티
1-2-1. 기능
- 모든 요청이 인증을 요구함 → 사실 이런 경우는 거의 없어서. 시큐리티를 기본 기능으로 사용할 일이 없다.
- base authentification과 form 인증이 설정됨
- accept header에 따라 보여주는 base auth 요구 화면이 달라짐
- 인메모리 user details 정보를 하나 생성
1-2-2. 자동설정
SecurityAutoConfiguration : 자동설정
-> SpringBootWebSecurityConfiguration
-» WebSecurityConfigurerAdapter.getHttp() 함수에서 모두 설정

- 모든 요청을 가로채서 인증되었는지 확인하고 아니면 로그인이나 베이직 auth로 보내기 소스
-» DefaultAuthenticationEventPublisher : 시큐리티 관련 이벤트를 발생
UserDetailsServiceAutoConfiguration : 인메모리 유저를 하나 만들어서 제공
개발자는 핸들러를 붙여서 이벤트 처리 가능
1-3. 스프링 시큐리티 적용
my 페이지는 로그인한 사용자만 볼 수 있게 해보자
1-3-1. 의존성 추가
        <dependency>
            <groupId>org.springframework.boot</groupId>
            <artifactId>spring-boot-starter-security</artifactId>
        </dependency>
결과 : 작성한 테스트가 깨짐
basic auth 관련 헤더가 담겨서 응답
MockHttpServletResponse:
           Status = 401
    Error message = Unauthorized
Headers = [WWW-Authenticate:"Basic realm="Realm"", X-Content-Type-Options:"nosniff", X-XSS-Protection:"1; mode=block", Cache-Control:"no-cache, no-store, max-age=0, must-revalidate", Pragma:"no-cache", Expires:"0", X-Frame-Options:"DENY"]
1-3-2. 테스트의 accept 헤더 변경
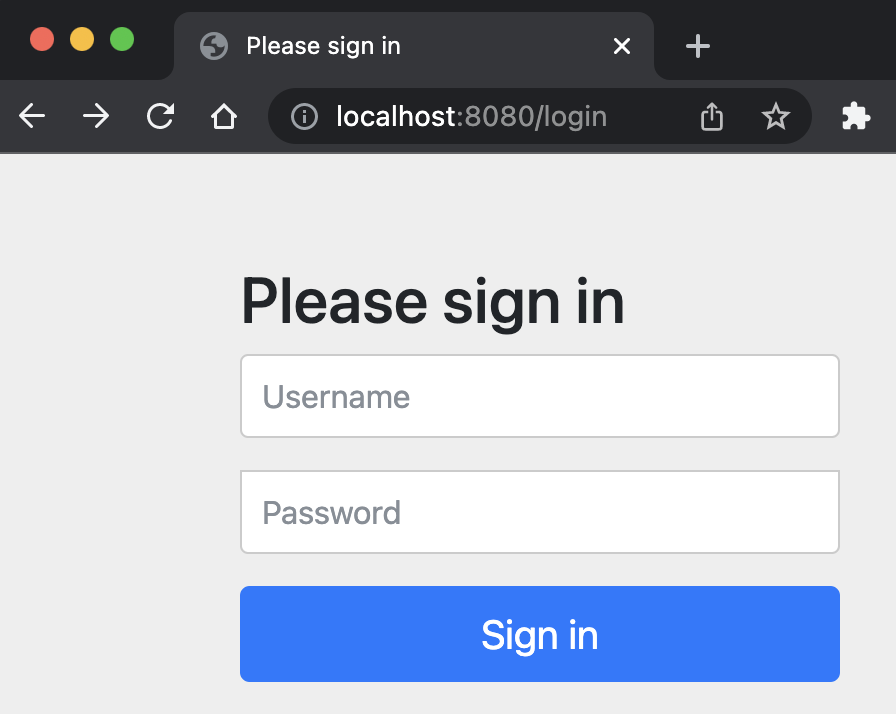
TEXT_HTML : 스프링의 기본 로그인 Form 으로 리다이렉션
@Test
    public void hello() throws Exception {
        mockMvc.perform(get("/hello")
                        .accept(MediaType.TEXT_HTML))
                .andDo(print())
                .andExpect(status().isOk())
                .andExpect(view().name("hello"));
    }
결과
MockHttpServletResponse:
           Status = 302
    Error message = null
Headers = [X-Content-Type-Options:"nosniff", X-XSS-Protection:"1; mode=block", Cache-Control:"no-cache, no-store, max-age=0, must-revalidate", Pragma:"no-cache", Expires:"0", X-Frame-Options:"DENY", Location:"http://localhost/login"]

- username : user (default)
-
password : 어플리케이션 기동 시 매번 랜덤 생성

1-3-3. 깨진 테스트 복구
의존성 추가 (버전관리를 parent에서 안 해주어서 저렇게 속성 값을 불러와주어야 함)
        <dependency>
            <groupId>org.springframework.security</groupId>
            <artifactId>spring-security-test</artifactId>
            <version>${spring-security.version}</version>
            <scope>test</scope>
        </dependency>
테스트 함수 또는 클래스에 @WithMockUser 추가
    @Test
    @WithMockUser
    public void hello() throws Exception {
        mockMvc.perform(get("/hello")
                        .accept(MediaType.TEXT_HTML))
                .andDo(print())
                .andExpect(status().isOk())
                .andExpect(view().name("hello"));
    }
    @Test
    public void hello_without_user() throws Exception {
        mockMvc.perform(get("/hello"))
                .andDo(print())
                .andExpect(status().isUnauthorized());
    }
    @Test
    @WithMockUser
    public void my() throws Exception {
        mockMvc.perform(get("/my"))
                .andDo(print())
                .andExpect(status().isOk())
                .andExpect(view().name("my"));
    }
2. 시큐리티 설정 커스터마이징
신규 프로젝트 생성 : springbootsecurity2 (의존성 웹, thymleaf 하나만)
2-1. 의존성 추가
        <dependency>
            <groupId>org.springframework.boot</groupId>
            <artifactId>spring-boot-starter-security</artifactId>
        </dependency>
2-2. 시큐리티 설정 커스터마이즈
root와 hello는 접속이 되고 그 외에는 모두 인증을 요구하도록 설정
// config.SecurityConfig.java
@Configuration
public class SecurityConfig extends WebSecurityConfigurerAdapter {
    @Override
    protected void configure(HttpSecurity http) throws Exception {
        http.authorizeRequests()
                .antMatchers("/", "/hello").permitAll()
                .anyRequest().authenticated()
                .and()
                .formLogin()
                .and()
                .httpBasic();
    }
}
2-3. account JPA 생성
2-3-1. 의존성 추가
<dependency>
            <groupId>org.springframework.boot</groupId>
            <artifactId>spring-boot-starter-data-jpa</artifactId>
        </dependency>
        <dependency>
            <groupId>com.h2database</groupId>
            <artifactId>h2</artifactId>
        </dependency>
2-3-2. Entity, Repository 추가
// account.Account.java
@Entity
public class Account {
    @Id
    @GeneratedValue
    private Long id;
    private String username;
    private String password;
}
// account.AccountRepository.java
public interface AccountRepository extends JpaRepository<Account, Long> {
}
2-4. service 생성
spring이 더이상 기본 유저를 만들지 않음 = UserDetailsService를 구현했기때문
@Service
public class AccountService implements UserDetailsService {
    @Autowired
    AccountRepository accountRepository;

    public Account createAccount(String username, String password) {
        Account account = new Account();
        account.setUsername(username);
        account.setPassword(password);

        return accountRepository.save(account);
    }

    @Override
    public UserDetails loadUserByUsername(String username) throws UsernameNotFoundException {
        Optional<Account> byUsername = accountRepository.findByUsername(username);
        Account account = byUsername.orElseThrow(() -> new UsernameNotFoundException(username));
        return new User(account.getUsername(), account.getPassword(), authorities());
    }

    private Collection<? extends GrantedAuthority> authorities() {
        return Arrays.asList(new SimpleGrantedAuthority("ROLE_USER"));
    }
}
결과 : password 인코더가 없어서 실패
java.lang.IllegalArgumentException: There is no PasswordEncoder mapped for the id "null"
2-5. password 인코딩 설정
PasswordEncoder 빈 등록
@Configuration
public class SecurityConfig extends WebSecurityConfigurerAdapter {
    @Override
    protected void configure(HttpSecurity http) throws Exception {
        http.authorizeRequests()
                .antMatchers("/", "/hello").permitAll()
                .anyRequest().authenticated()
                .and()
                .formLogin()
                .and()
                .httpBasic();
    }

    @Bean
    public PasswordEncoder passwordEncoder() {
        return PasswordEncoderFactories.createDelegatingPasswordEncoder();
    }
}
PasswordEncoder를 주입받아서 계정 정보를 저장하기 전에 인코딩
@Service
public class AccountService implements UserDetailsService {
    @Autowired
    AccountRepository accountRepository;

    @Autowired
    PasswordEncoder passwordEncoder;

    public Account createAccount(String username, String password) {
        Account account = new Account();
        account.setUsername(username);
        account.setPassword(passwordEncoder.encode(password));

        return accountRepository.save(account);
    }

    @Override
    public UserDetails loadUserByUsername(String username) throws UsernameNotFoundException {
        Optional<Account> byUsername = accountRepository.findByUsername(username);
        Account account = byUsername.orElseThrow(() -> new UsernameNotFoundException(username));
        return new User(account.getUsername(), account.getPassword(), authorities());
    }

    private Collection<? extends GrantedAuthority> authorities() {
        return Arrays.asList(new SimpleGrantedAuthority("ROLE_USER"));
    }
}
결과

추가로 구현 필요한 시큐리티 기능
- CSRF 설정
- 인증방식 변경(OAuth 등)
- 로그인, 계정 생성을 RestAPI 또는 form으로 입력받는 것으로 변경
- 로그인 form을 원하는 모양으로 커스텀

댓글남기기